Creating a Featured Image Using Multiple Portraits Using Adobe Photoshop
If you need a featured image for a story that covers multiple individuals, then you would likely need to create a single featured image that contains both providers. The instructions are included below so that you can do it yourself in the future and not have to wait on UAMS Web Services. But you can still reach out to UAMS Web Services if you need assistance.
Access a shared a folder called “UAMS Image Templates” on Box.
https://app.box.com/s/27sx8iqaoad4sm1d8ip36yljlrp8xcdw
In that folder is another folder called “Featured Images.”
https://app.box.com/s/k0wbc8a0x39muvnibixw5xlzf0l3u4wb
In that folder is another folder called “Multiple Portraits.”
https://app.box.com/s/s8gxyp0rbknkt3ivlnq5mobi8wbj61qv
This folder contains several Photoshop files that you can use to place and resize multiple headshots in a consistent and pleasing manner. Each version is specific to how many individuals you are including in the featured image (two, three, four, five or six individuals).
In this example, I will act as if we need a featured image containing two individuals, so we will use Featured-Image_2-Up.psd.
https://app.box.com/s/6o86hnliojq16sg3nnia12ijw9810wg7
Download that file, then download the headshots for each provider from Webdam.
Then place each image in the appropriate folder in Photoshop.
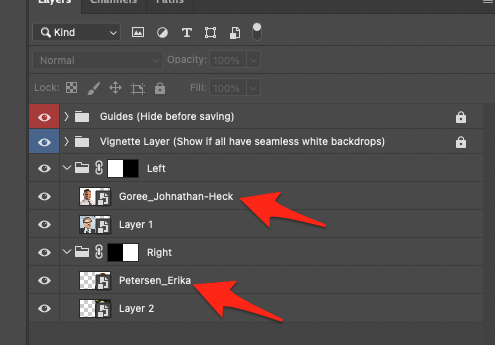
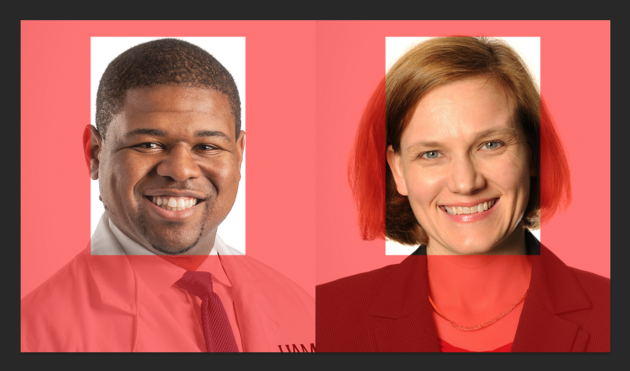
Resize each image so that their head is contained within the relevant box created by the translucent red guide layers included in the Photoshop file. Start with resizing each so that the top of their head are at the top of the box and the bottom of their chin is at the bottom of the box.
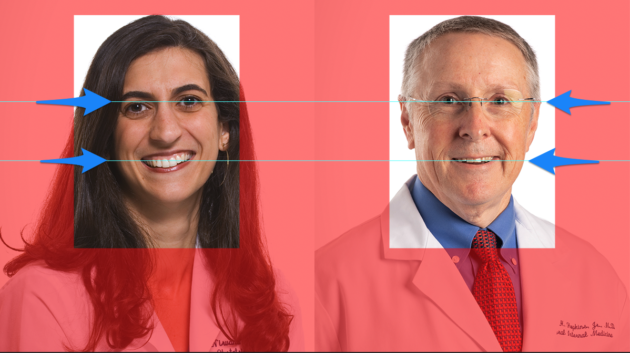
Sometimes, this placement results in an awkward appearance. If this happens, then begin by reducing the size of the offending portrait until it is no longer awkward, while keeping the top of the head at the top of the box. Then resize the other portraits to mirror that size change. Attempt to keep the eyes and mouths on the same vertical level as the other portraits.
If this results in the image not filling the space, then that’s where the full-size versions of the headshots often come into play, as they have more image content than the cropped versions (shoulders, arms, etc.). If there is no full-size version of the relevant headshot, message me and I will work on adding one to the Portraits Cropped folder.
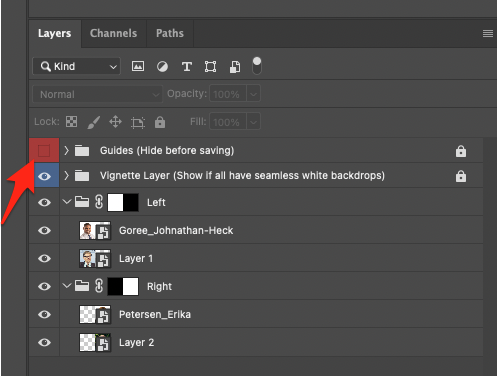
If both images are on seamless white backgrounds, turn on the Vignette Layer. This will help add some visual separation.
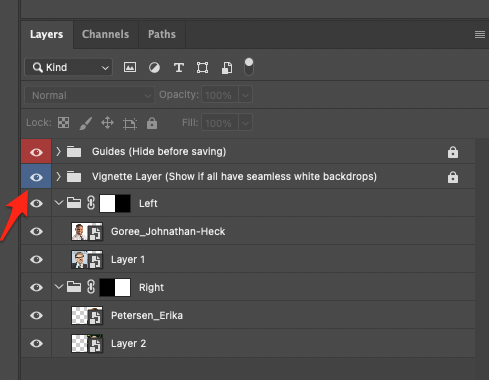
Hide the Guides layer and save your image.