Creating a Featured Image Using a Single Studio Portrait
If you need a featured image for a story that covers a single individual, then you can create a composite image using a studio portrait of the individual and a building photo.
The studio portrait of the individual must have been taken on a seamless white background. It must also have been framed so that the individual’s entire body is visible down to around their elbows.
Download the Photoshop Files
Access a shared a folder called “UAMS Image Templates” on Box.
https://app.box.com/s/ra3cc40i66rzb78enbbrh8nttdtvhr26
In that folder is another folder called “Featured Images.”
https://app.box.com/s/u6zdinjt2dpe1hial99fl2c6bg73huu9
In that folder is another folder called “Individual and Light Background.”
https://app.box.com/s/v3c8e1dlcs90fs3eaxuwe51nz5nwlo8l
This folder contains a Photoshop Document file (Featured-Image_Composite_Individual-and-Light-Background.psd) that you will use to create the composite image. There is also a Photoshop Actions file (Featured-Image_Composite_Individual-and-Light-Background_Actions.atn) that you will use to import certain actions into Photoshop. Download both files. Contained in the “Assets” folder are files that are linked in the main Photoshop Document file for each background option.
Download the entire folder.
Verifying Whether the Portrait’s Background is Solid White
In order for the Photoshop template and actions to function properly, the portrait must have a solid white background.
To verify that the portrait has a solid white background — and if not, to clean up the background — follow the steps outlined on Cleaning up the White Background of a Studio Portrait.
Creating the Composite Image
Follow these steps to create the composite image. In practice, the process of creating the composite image takes about four minutes.
Open the Template
Open Featured-Image_Composite_Individual-and-Light-Background.psd.
If Photoshop asks you to locate assets such as template_16-9_bg-image_cancer-institute, then click Relink and navigate to the relevant file within the Assets subfolder in the folder you downloaded from Box. Once you relink a single file, the rest should automatically be relinked as a result.
Insert the Source Portrait Image
In the Layers panel, select the folder named Insert photo and mask.
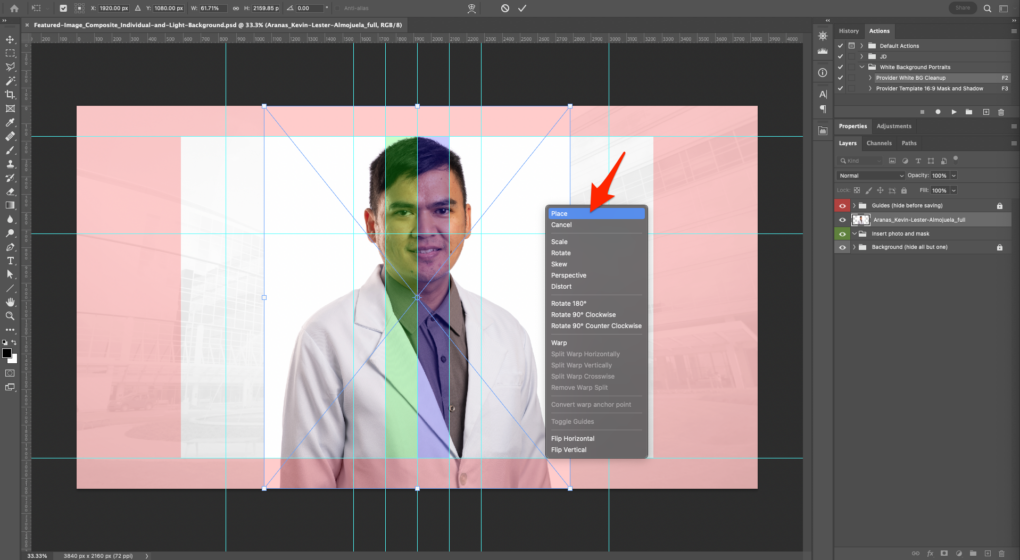
Embed the full-size portrait into the Photoshop Document file by going to File > Place Embedded… then navigating to the file, selecting the file and clicking Place. The image will now be added as its own layer but is not actually placed yet.
Right-click anywhere on the image and click Place to place the image. You may also press Enter or Return to place the image.
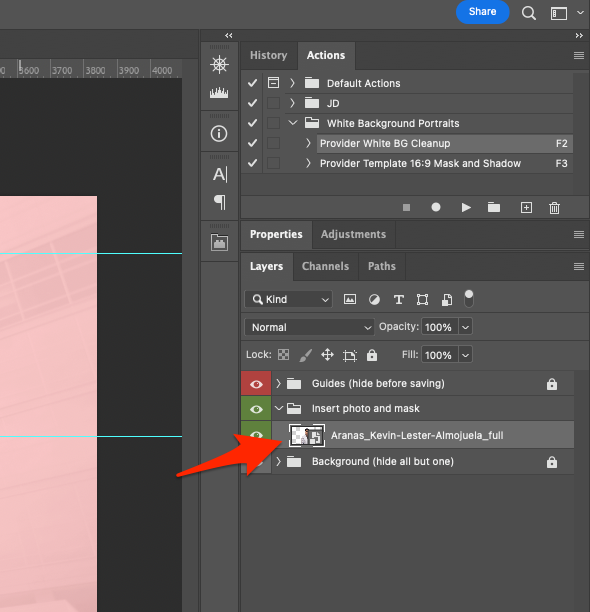
Click and drag the portrait image layer into the Insert photo and mask folder.
Configure Certain Photoshop Settings
Turn off Snap by going to View > Snap. If there is a checkmark beside Snap, click Snap to turn it off. If there is not a checkmark beside Snap, do nothing.
Show Guides by going to View > Show > Guides. If there is a checkmark beside Guides, do nothing. If there is not a checkmark beside Guides, Click Guides to show them.
Open the Tools tab in the Photoshop Preferences dialog. On Windows, go to Edit > Preferences > Tools. On Mac, go to Photoshop > Preferences > Tools. You can also use the keyboard shortcut Ctrl + K (on Windows) or ⌘ + K (on Mac) then go to the Tools tab.
Ensure that Show Reference Point when using Transform is checked then click OK.
Resize the Source Portrait Image and Adjust Its Placement
With the portrait image’s layer selected in the Layers panel, open the Free Transform tool by going to Edit > Free Transform. You can also use the keyboard shortcut Ctrl + T (on Windows) or ⌘ + T (on Mac).
Ensure that the Maintain aspect ratio button is active. This appears as a link icon at the top of the screen. If it is active, there will be a dark box behind it. If it is inactive, there will be no dark box behind it.

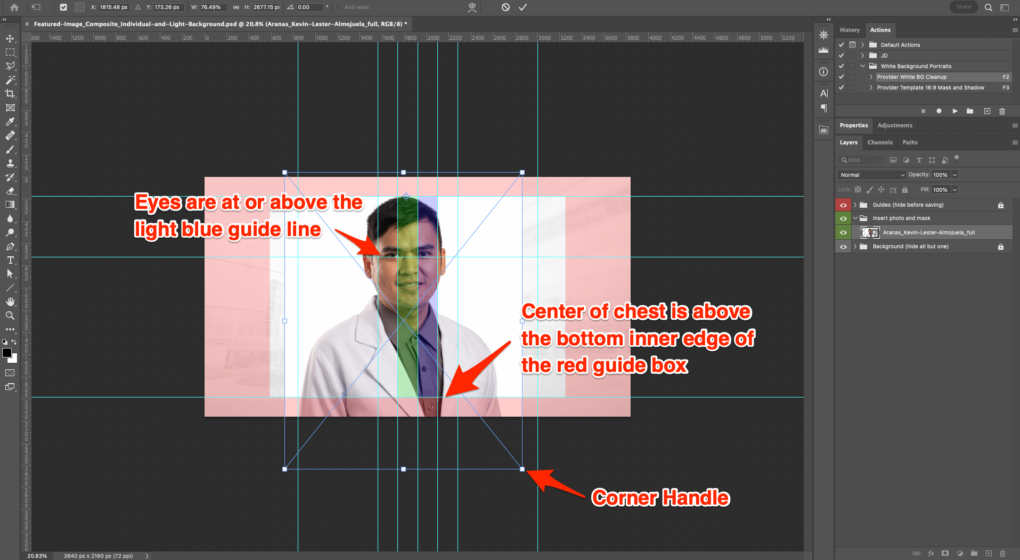
While holding Shift, click and drag the image sideways so that the individual’s nose is horizontally centered within either the translucent green rectangle guide or the translucent blue rectangle guide. If the individual is facing to the right or if they are directly facing the camera, center their nose in the translucent green rectangle guide. If they are facing the left, center their nose in the translucent blue rectangle guide.
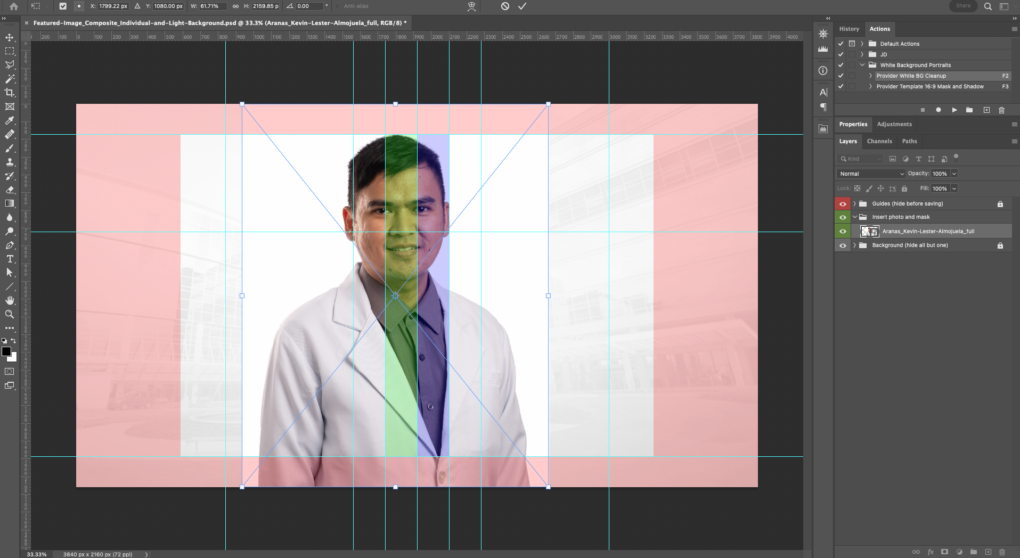
While holding Shift, click and drag the image up or down so that the top of their hair is at the upper inner edge of the red guide box.
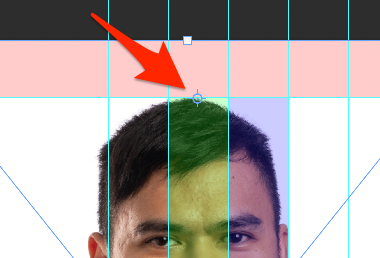
Set the reference point. While holding Alt (on Windows) or Option (on Mac), click the spot in the middle of the top edge of either the translucent green rectangle guide or the translucent blue rectangle guide — whichever was used when centering the individual’s nose. You can click and drag to get the best placement of the preference point.
While holding Shift (on Windows and Mac) and Alt (on Windows) or Option (on Mac), click and drag the bottom right corner handle on the portrait image until the center of the individual’s chest is at the bottom inner edge of the red guide box.
If the individual is wearing a lab coat with embroidery on the chest, make sure the embroidery is still above the bottom inner edge of the red guide box.
Make sure the individual’s eyes are at or above the light blue guide line that is running horizontally across the canvas about a third of the way down from the top.
Once the image has been scaled appropriately, right-click anywhere on the image and click Place to place the image. You may also press Enter or Return to place the image.
Hide the Guides Folder Layer
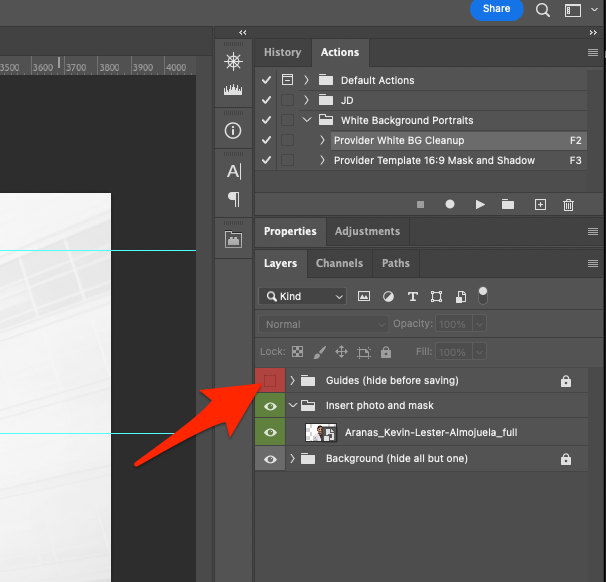
In the Layers panel, hide the Guides (hide before saving) folder layer by clicking the Eye icon on the left side of the layer panel. When the folder layer is hidden, the Eye icon will be replaced with an empty box.
Use an Action to Duplicate and Mask the Source Portrait Image and to Add Exposure Adjustment Layers
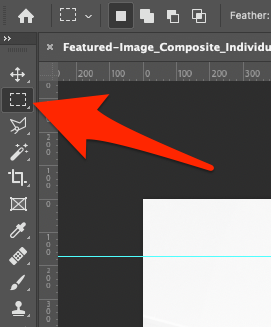
Select the Rectangular Marquee Tool.
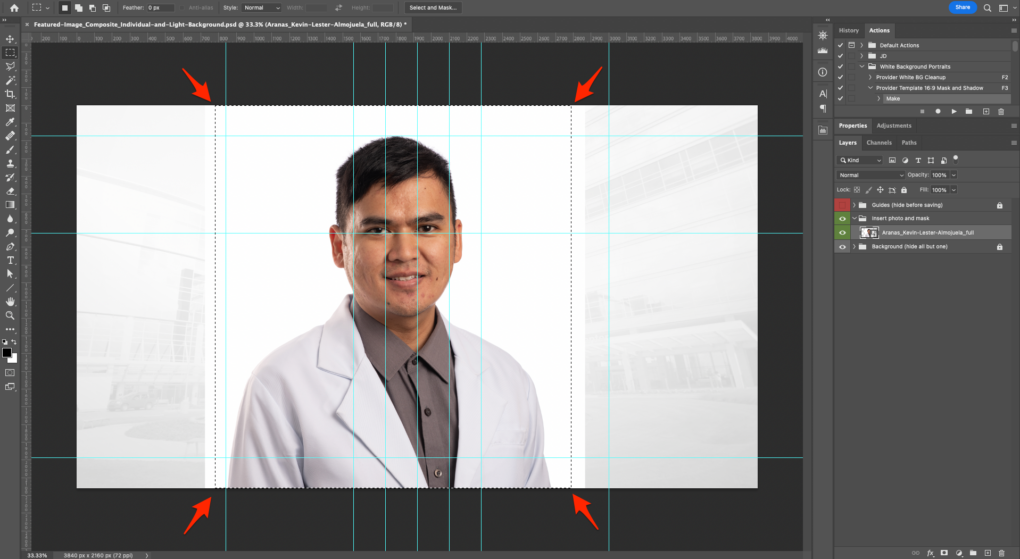
With the image layer selected in the Layers panel, click and drag a marquee around the individual’s body but within the edges of the portrait image’s background. Ensure that the marquee includes the top and bottom edges of the canvas by starting and ending your selection beyond the top and bottom edges of the canvas.
With the image layer selected in the Layers panel, play the Provider Template 16:9 Mask and Shadow action by selecting that action in the Actions panel and clicking the Play selection button (represented by a triangle / play button).
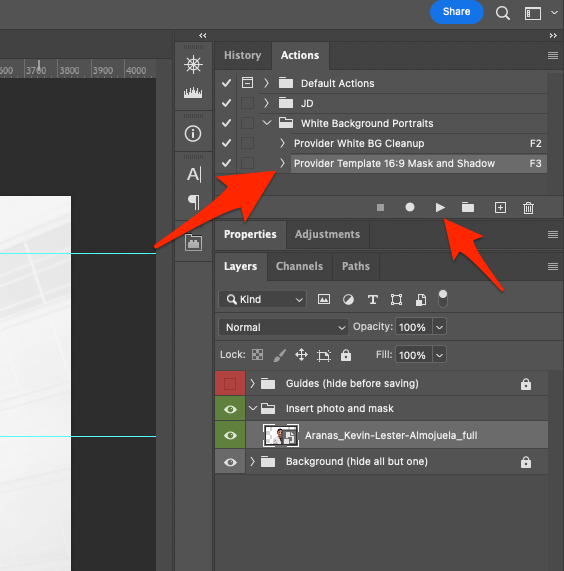
The portrait image layer will now have a mask layer on it. There will also be a duplicate of the portrait image layer with a mask layer and a Multiply blending mode. There will also be two exposure adjustment layers.
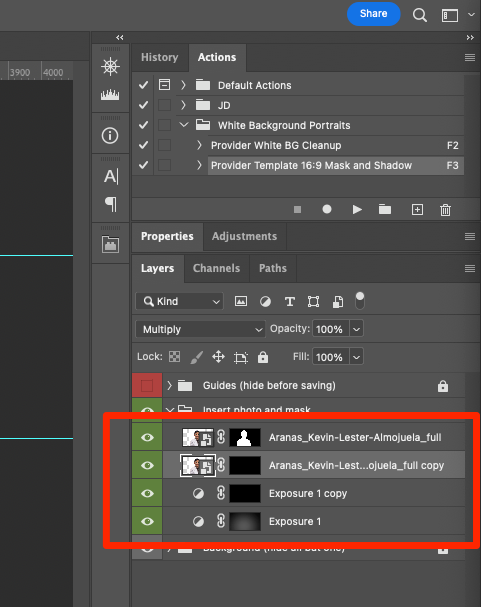
Adjust the Mask on the Top Exposure Adjustment Layer to Create Visual Separation with the Background
Select the mask layer on the Exposure 1 copy layer in the Layers panel.
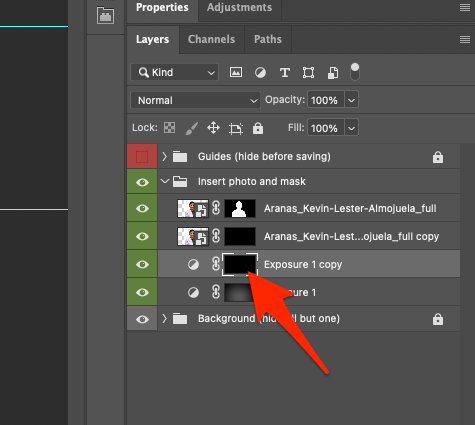
Hide Guides by going to View > Show > Guides. If there is a checkmark beside Guides, Click Guides to hide them. If there is not a checkmark beside Guides, do nothing.
Select the Eraser Tool.
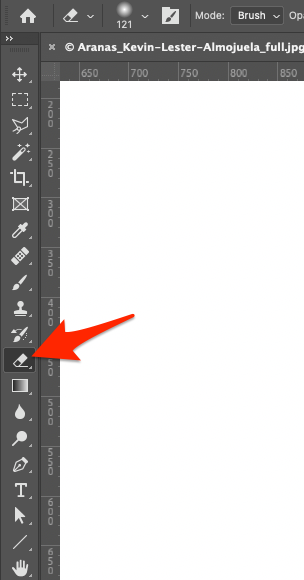
Set Opacity to 100%. Set Flow to 100%. Set Smoothing to 0%.

With the Eraser Tool selected, right-click anywhere on the image and set the Size to 1500 px and the Hardness to 0%.
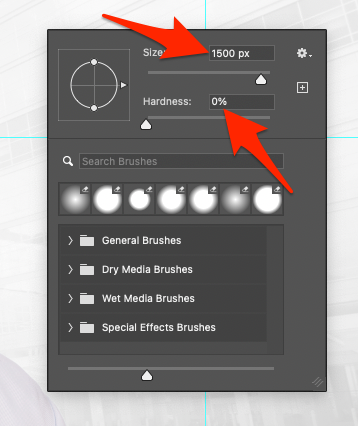
Set Opacity to 20%. Set Flow to 100%. Set Smoothing to 0%.

Set the default foreground/background colors by pressing D. This will result in the foreground color being white and the background color being black. Note that these are colors for the tool and do not have any current effect on the image itself.
Switch the foreground/background colors by pressing X. This will result in the foreground color being black and the background color being white. Note that these are colors for the tool and do not have any current effect on the image itself.

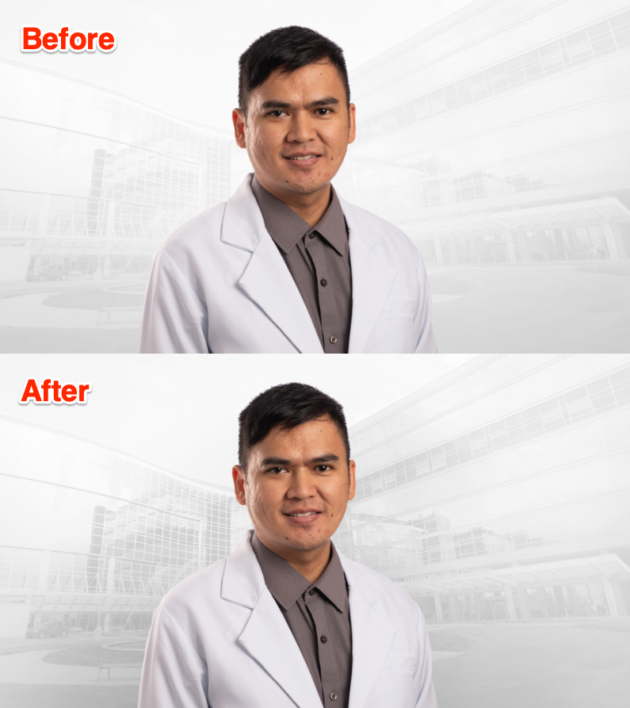
Click and drag the Eraser tool around the individual’s arms and shoulders until there is a good visual separation between the individual’s clothing and the background. Start by clicking and dragging a single arc from the bottom of one side, up over their shoulders and down the other side. Then click and drag on any other areas with out good contrast between the individual’s body and the background (e.g., the individual’s right shoulder).
If you need additional darkness, click the mask layer on Exposure 1 in the Layers panel and click and drag to add more darkness. This layer will add darkness more rapidly than the previous layer and should be used sparingly.
If you wind up with too much darkness around the individual, switch the foreground/background colors by pressing X. This will result in the foreground color being black and the background color being white. Click and drag the Eraser tool on the overly dark areas to begin removing that darkness.
If the individual is not wearing a white lab coat or some other light-colored clothing, this step may not be necessary.
Adjust the Mask Around the Top Portrait Source Image Layer
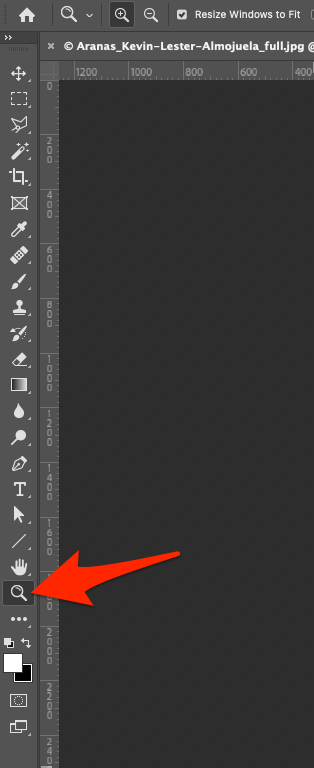
Select the Zoom Tool.
Click and drag around the individual’s head to zoom in on that area.
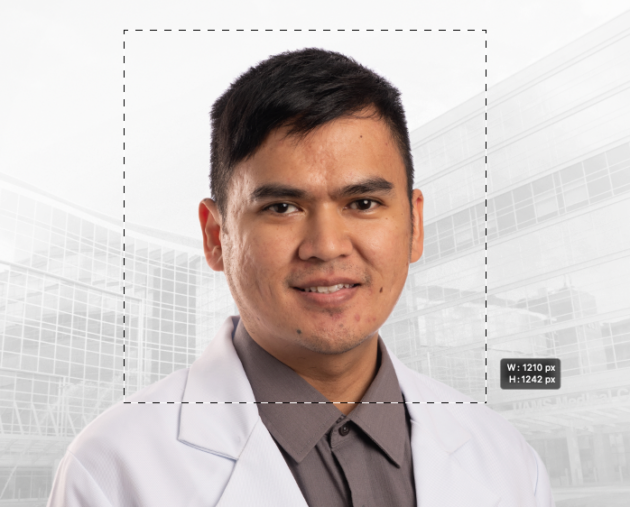
In the Layers panel, select the mask layer on the top portrait layer.
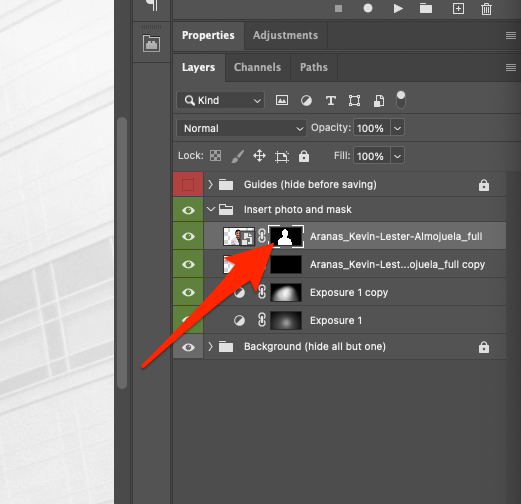
Select the Eraser Tool.
Set Opacity to 100%. Set Flow to 100%. Set Smoothing to 0%.
With the Eraser Tool selected, right-click anywhere on the image and set the Size to 100 px and the Hardness to 0%.
Set the default foreground/background colors by pressing D.
Click and drag the Eraser Tool along the edges of the individual’s hair and any other areas where the solid white background shows through. You can change the Size and Hardness of the Eraser Tool as necessary. The end result should be one where there are no areas where the background shows through anything other than the soft edges what the Eraser Tool left behind.
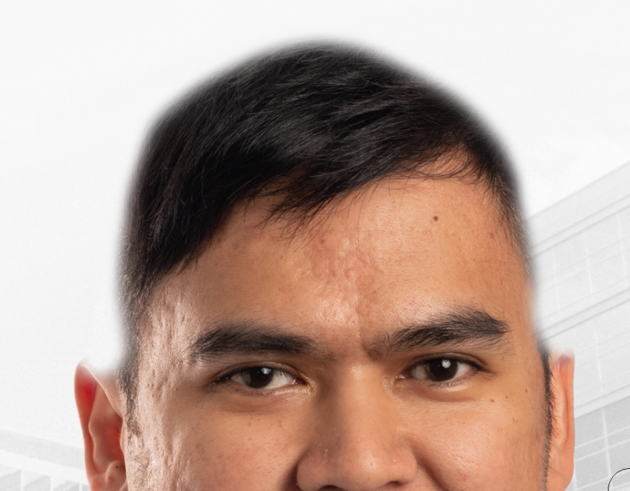
Adjust the Mask for the Second Portrait Source Image Layer
In the Layers panel, select the mask layer of the second portrait image layer. This layer’s name should end in copy.
With the Eraser Tool selected, right click anywhere in the image and set the Size to 200 px and set the Hardness to 80%.
Set the default foreground/background colors by pressing D.
Switch the foreground/background colors by pressing X.
Click and drag the Eraser Tool across the areas you erased on the other portrait image layer’s mask. This should result in all of the individual’s hair reappearing but with the background elements appearing in the spaces where the solid white background previously showed through.
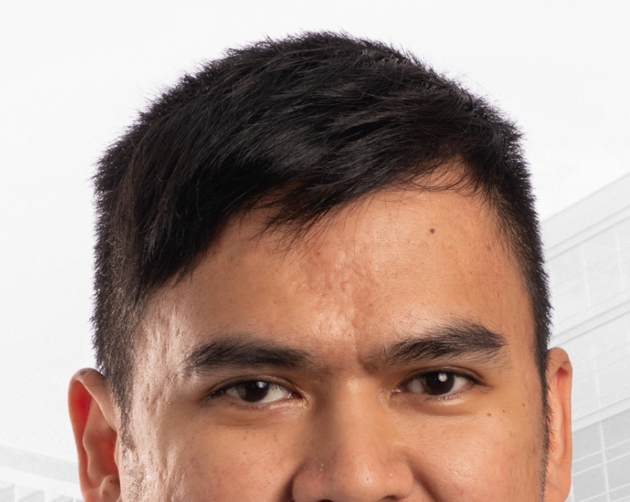
Make Additional Adjustments to the Mask for the Top Portrait Source Image Layer
In the Layers panel, select the mask layer on the top portrait layer.
With the Eraser Tool selected, right click anywhere in the image and set the Size to 20 px and set the Hardness to 80%.
Set the default foreground/background colors by pressing D.
Switch the foreground/background colors by pressing X.
Carefully click and drag the Eraser Tool in any areas where our previous masking of this layer covered solid edges (e.g., ears, cheeks, neck, collar). You will notice that those areas initially appear darker than they would otherwise. Running the Eraser Tool across these areas will result in them lightening back up. Adjust the Size and Hardness of the Eraser Tool as necessary. Be careful not to unmask beyond the edge of the body part so that the solid white background of the portrait image does not reappear.
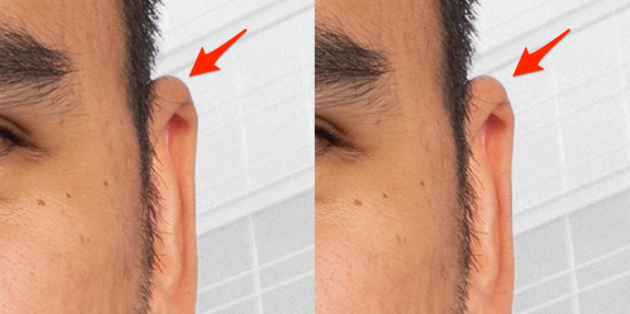
You can visualize the edges of the mask layer by holding Ctrl (on Windows) or ⌘ (on Mac) then clicking the mask layer to see if you have missed any areas. Deselect when you are done visualizing the edges of the mask layer by pressing Ctrl + D (on Windows) or ⌘ + D (on Mac).
Make Additional Adjustments to the Mask for the Second Portrait Source Image Layer
The unmasking on the second portrait image layer may have left behind some dark fringe around the solid edges (e.g., ears, cheeks, neck, collar). In the Layers panel, visualize the edges of the mask layer on the second portrait image layer by holding Ctrl (on Windows) or ⌘ (on Mac) and then clicking the mask layer. Note the areas with solid edges that are within this selection, then deselect by pressing Ctrl + D (on Windows) or ⌘ + D (on Mac).
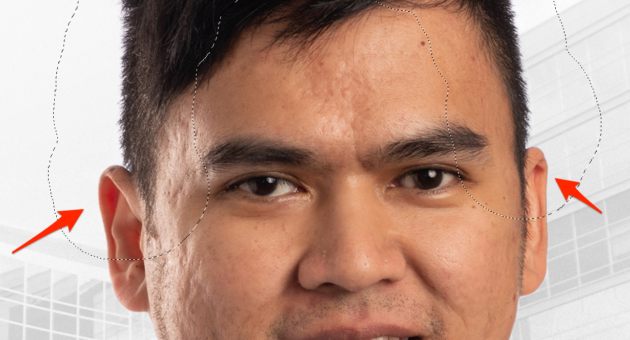
Select the mask layer on the second portrait image layer.
With the Eraser Tool selected, right click anywhere in the image and set the Size to 20 px and set the Hardness to 20%.
Set the default foreground/background colors by pressing D.
Click and drag the Eraser Tool along the solid edges that have the dark fringe to remove that dark fringe.
If doing this results in a fuzzy edge on the areas that should be a solid edge, switch to the mask layer on the top portrait image layer. Set the default foreground/background colors by pressing D. Switch the foreground/background colors by pressing X. Set the Eraser Tool’s Hardness to 80%. Carefully click and drag on those areas to fill them back in. Adjust the Eraser Tool’s Size and Hardness as needed.
Flatten and Save the Image
Once you are satisfied that the portrait image blends well with the background, flatten the image by going to Layer > Flatten Image.
Click File > Save As.
Click Save a Copy.
Navigate to the folder where you want to save the image.
Set the Format dropdown to JPEG.
Set the filename to match the original portrait file’s filename (e.g., Aranas_Kevin-Lester-Almojuela_full.jpg) but ending in _wide.jpg rather than _full.jpg.
Click Save.
Set the JPEG quality to 10.
